Hearthstone: Zentimo Guide - How to defeat Zentimo, tips, Prize Fighters and Shrines
Everything you need to know about Hearthstone's latest slice of single player content.
If you’ve ever played Dungeon Run or Monster Hunt in previous Hearthstone expansions, you’ll be familiar with Rumble Run. It’s a similar gig, as you’ll face off against an increasingly difficult set of bosses in a single elimination format. The fun lies in finding ways to overcome these foes and building your deck along the way.
For those of you who haven’t dabbled in Hearthstone’s roguelike adventures, here’s a quick breakdown of what you can expect from Rumble Run:
- When you first start a Rumble Run, you’ll need to choose between one of three Shrines, all of which represent three of the nine teams taking part.
- Each team houses three Shrines, but you’ll only gain access to one of them when you start a run.
- Once you’ve picked a side, you’ll face off against eight increasingly difficult boss battles.
- Work your way through the Rumble Run and you’ll start accumulating minions and Passive Treasures which will empower your deck further.
The boss we’re covering in this guide is a powerful shaman called Zentimo, and we’ve put together everything we currently know about this encounter just below. We've also got a bunch of tips and strategy advice so you’ll be more than prepared to overcome this encounter when you face up to him.
Make sure you have a read of our Rumble Run guide for an overview of what this new single-player content brings to the table.
This article contains additional reporting by James Pickard
Other Rumble Run boss guides:
- Wardruid Loti - Wardruid Loti guide (Rumble Run)
- Zul'jin - Zul'jin guide (Rumble Run)
- Hex Lord Malacrass - Hex Lord Malacrass guide (Rumble Run)
- High Priest Thekal - High Priest Thekal guide (Rumble Run)
- Princess Talanji - Princess Talanji guide (Rumble Run)
- Captain Hooktusk - Captain Hooktusk guide (Rumble Run)
- Zentimo - Zentimo guide (Rumble Run)
- High Priestess Jeklik - High Priestess Jeklik guide (Rumble Run)
- War Master Zoone - War Master Voone guide (Rumble Run)
Zentimo Shrines
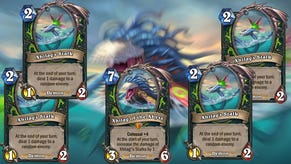
Here’s a look at all three of Zentimo’s Shrines. He’ll use a randomly selected Shrine at the start of each run.
- Krag'wa's Grace: Your spells cost (2) less
- Krag'wa's Lure: After you Overload, give your minions that much Attack
- Tribute from the Tides: Your Battlecries trigger two additional times
Zentimo Cards
A host of cards have been leaked on Reddit ahead of Rumble Run’s launch, and we’ve listed them down below:
- Deepsea Diver: Start of Game: Draw this. Battlecry: Unlocked your Overloaded Mana Crystals
- Leap Frog: Deal 3 damage to a random enemy minion. If it dies, repeat this
- Naga Tonguelasher: Overload 3 of your opponent's Mana Crystals
- Overcharged Totem: After you Overload, deal 2 damage to all enemy minions
- Croak Jouster: Discover a spell. If you're Overloaded, keep all 3
- War Heralder: Rush. Overkill: Add 3 random Shaman spells to your hand
Zentimo Tips and Strategy Advice
When you face Zentimo he’ll be using one of three possible Shrines. Here are a few tips to help you deal with whichever one you end up facing.
Krag’wa’s Grace:
- This Shrine can cause a lot of problems. The effect is very powerful and at 10 Health it presents a significantly tough challenge to take down quickly. You will want to focus it as much as possible, though.
- If you have hard removal effects then consider using them on the Shrine to keep it out of play as much as possible.
- Consider that powerful Shaman spells that are usually offset by the Overload downside won’t worry so much about that negative effect is they’re discounted by two mana.
- The mana cost reduction for Zentimo’s spells with this Shrine is especially powerful in the early game when he can make strong tempo plays to remove your Shrine or minions using cards such as Lightning Bolt for free.
- If you come up against this Shrine in the early rounds, it may be worth trying to race Zentimo down once the Shrine has been killed. This is much easier to do when he has a small Health pool, though a control game may be wise in the later rounds.
Krag'wa's Lure:
- It’s probably the least powerful Shrine available to Zentimo but does have a small chance to overwhelm you if you leave it uncontested.
- As Krag’wa’s Lure only has 2 Health it’s always worth quickly killing it off to eliminate the effect from the game as much as possible.
- Without the Shrine active the deck becomes much weaker as all the Overload cards will keep Zentimo too far behind while you can scream out ahead.
- The only thing you need to be careful of is the number of powerful board clears he has available. Lightning Storm and Volcano can wipe your board if you over-extend, while Lava Burst is good at taking out larger single minions.
- If Zentimo survives well into the late game with this Shrine then expect to see a Snowfury Giant at a massively reduced cost. These can be a real problem to deal with if you have no removal, so try to end the game early.
Tribute from the Tides:
- Another potent Shrine for Zentimo, but the low Health means you should be able to keep it dormant for much of the game so he gets minimal use from it.
- This Shrine will allow Zentimo to go wide on the board fairly quickly with cheaper minions, so hold onto your AOE board clears if you have any so you don’t fall too far behind in the early game.
- There are some potent Battlecry effects you need to be cautious of when facing this Shrine, especially late game cards such as Fire Elemental. For that reason, we’d suggest taking as a speedy approach to the match to end it as soon as possible.


